
 @itaysk
 itaysk
 itaysk
DC/OS Service Discovery and Load Balancing by Example
Starting out with DC/OS and Marathon is fun and easy, but I did found the service discovery and load balancing story a bit confusing. Documentation pages like this make it clear what different layers of solutions are there, but the terminology used, inter-dependency between components, and configuration choices did not help to thoroughly understand this topic.
In this post I wanted to re-present this topic by example. I’ll built up from the simple scenario to more complicated ones, while demonstrating in detail each step.
Let’s create a service
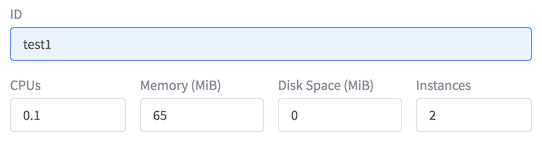
Let’s jump to the Marathon UI, and create an application with the following settings:
Call it ‘test1’ and assign it minimal resources; and make it 2 instances.
 We will use the docker image from ‘tutum/hello-world’, and Select ‘Bridged’ networking.
 The ‘tutum/hello-world’ image is just a simple web server (nginx) that shows the hostname of the server; This will be convenient for our experiment.
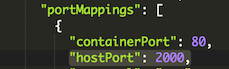
In the network tab, set the container port to ‘80’, switch to json mode, and add ‘“hostPort”:2000’. This maps port 80 in the container to port 2000 on the host.

 Finally, deploy the app.
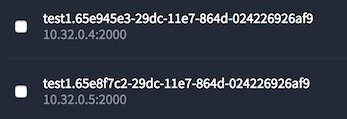
Go to marathon UI, under ‘Applications’, and select ‘test1’. You’ll see how it was placed:
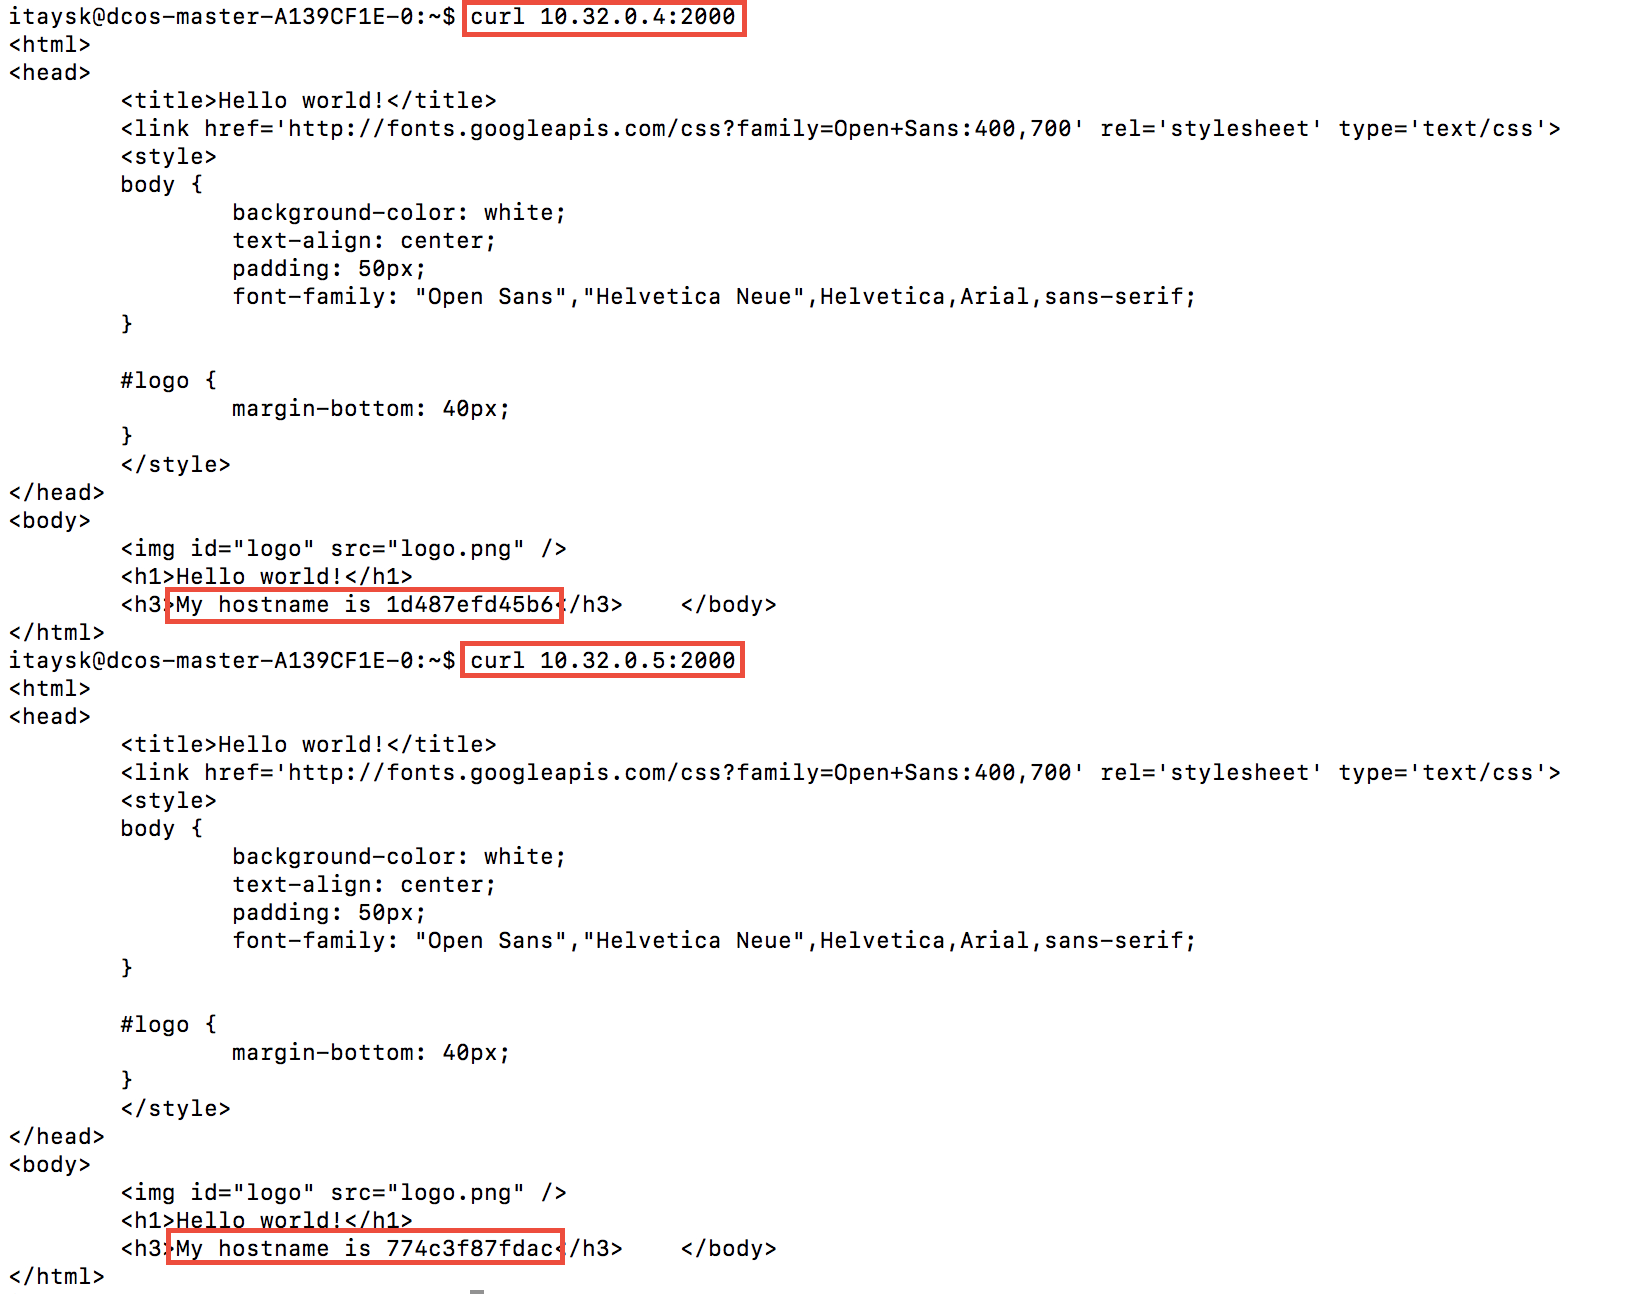
To test our app, we ssh in to the master, and curl into any of the agent nodes with port 2000.
MesosDNS
To be honest, we didn’t really need to look at the Marathon UI in order to know how the instances was placed on the nodes, right? since we created a 2 instance service on a 2 node cluster, and required that both instances will use the same port - we left the system only one possible arrangement, that each node will host one instance and give it port 2000.
What if we scheduled those same 2 instances in a 5 node cluster? port 2000 could be available on any of the agent nodes, and we wouldn’t know which IPs to hit. This is where MesosDNS can help.
MesosDNS is constantly checking the state of task scheduling in the cluster, and generating DNS records under ‘servicename.framework.mesos’.
So in our case, we should be able to use ‘test1.marathon.mesos’ - lets try!
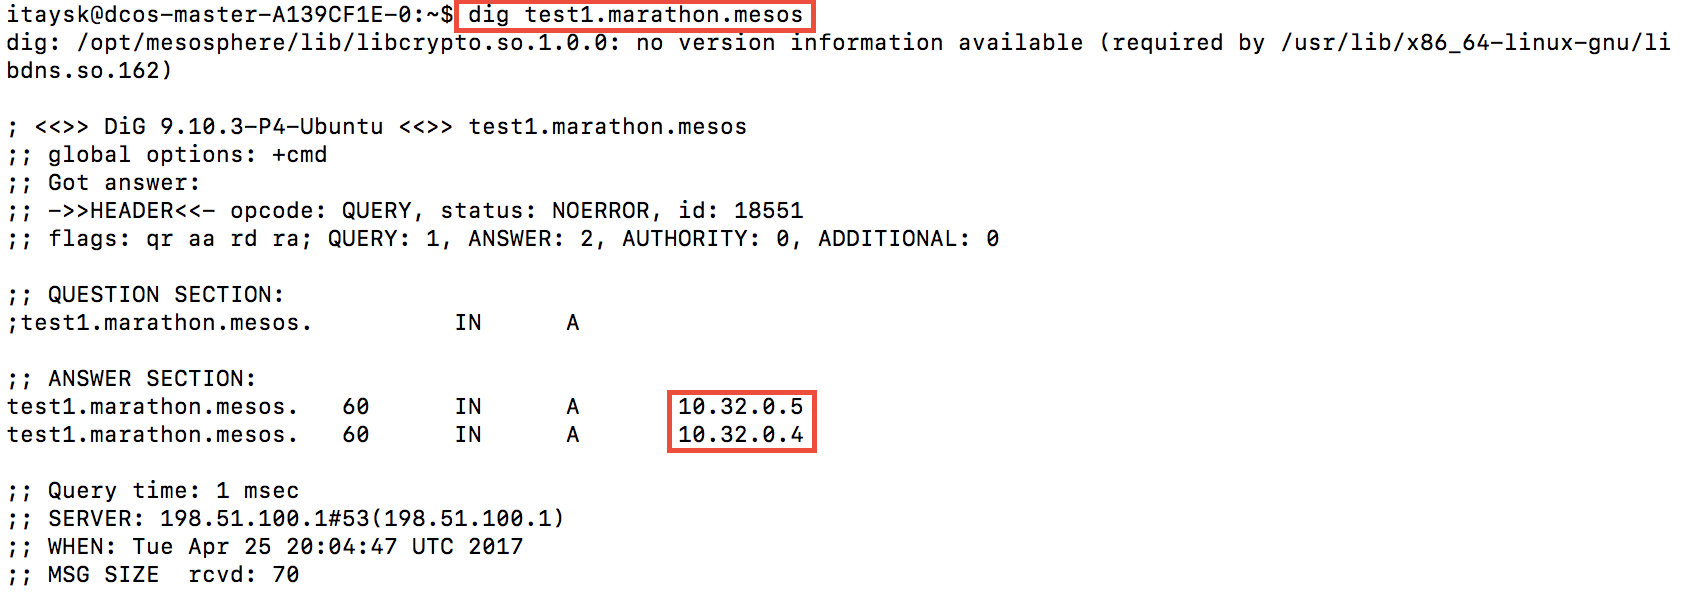
As you can see, it resolved to both nodes, because it is running on both.
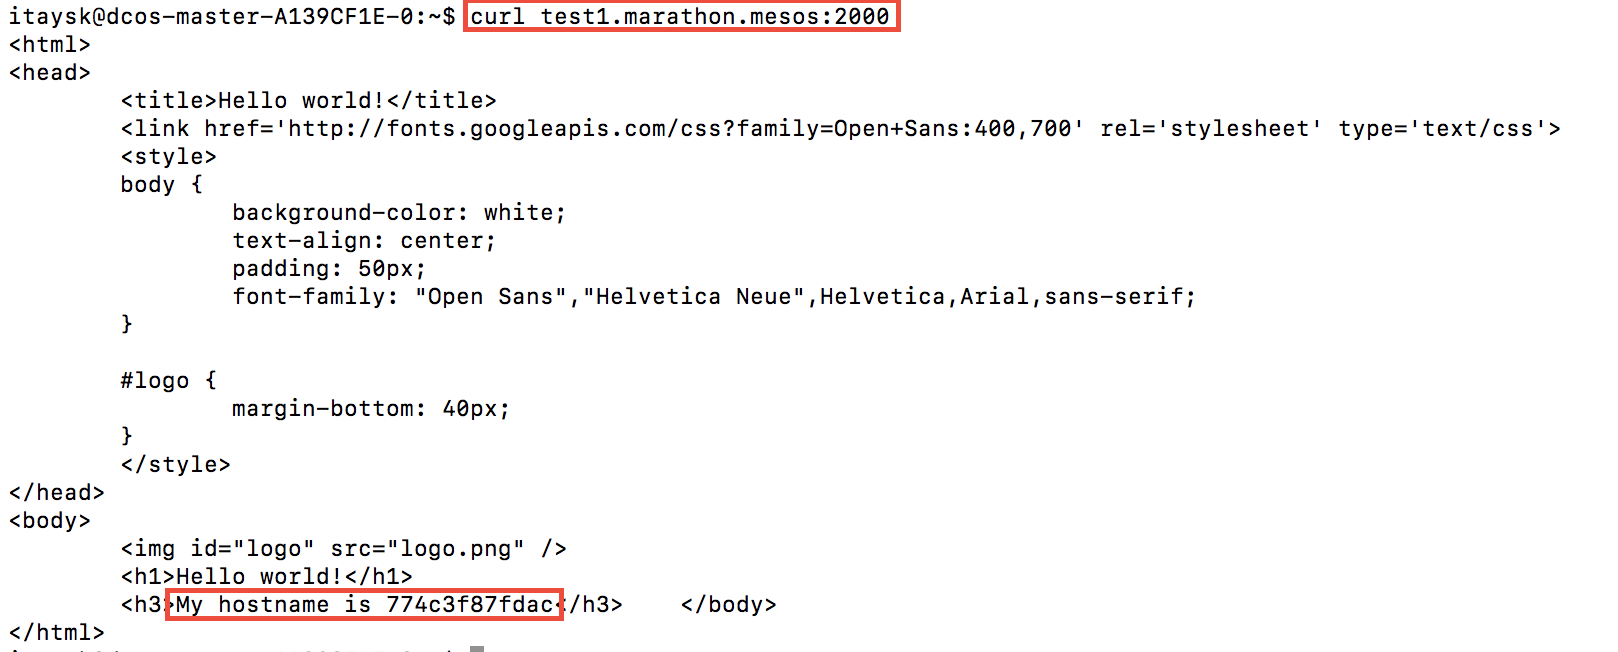
We can use this to access the service:
dynamic host ports
This was fun, but not very practical. In a real world scenario you wouldn’t want to require a specific host port because that will limit the flexibility of the platform to do it’s job, you won’t be able to have more that one instance on the same host, and you might be unavailable to recover from failures if there isn’t a host with that required port available.
A better approach is to not require a host port, and just leave it as ‘0’. In fact, this is the default behavior. Remember how we had to switch to JSON mode in order to specify ‘hostPort’? that just to prove that it’s not a recommended use case. The best practice is to let the platform pick a port for us. Let’s create another service with dynamic host port:
Create a marathon app with same settings as ‘test1’, but this time don’t do any change in JSON mode. This will default ‘hostPort’ to ‘0’ which means each instance will be assigned a random port. Let’s call this one ‘test2’.
Go to marathon UI, under ‘Applications’, and select ‘test2’. You’ll see how it was placed:
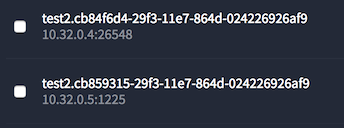 (BTW - notice how both instances landed on the same node? We already gave the system more freedom in how it places instances in the cluster)
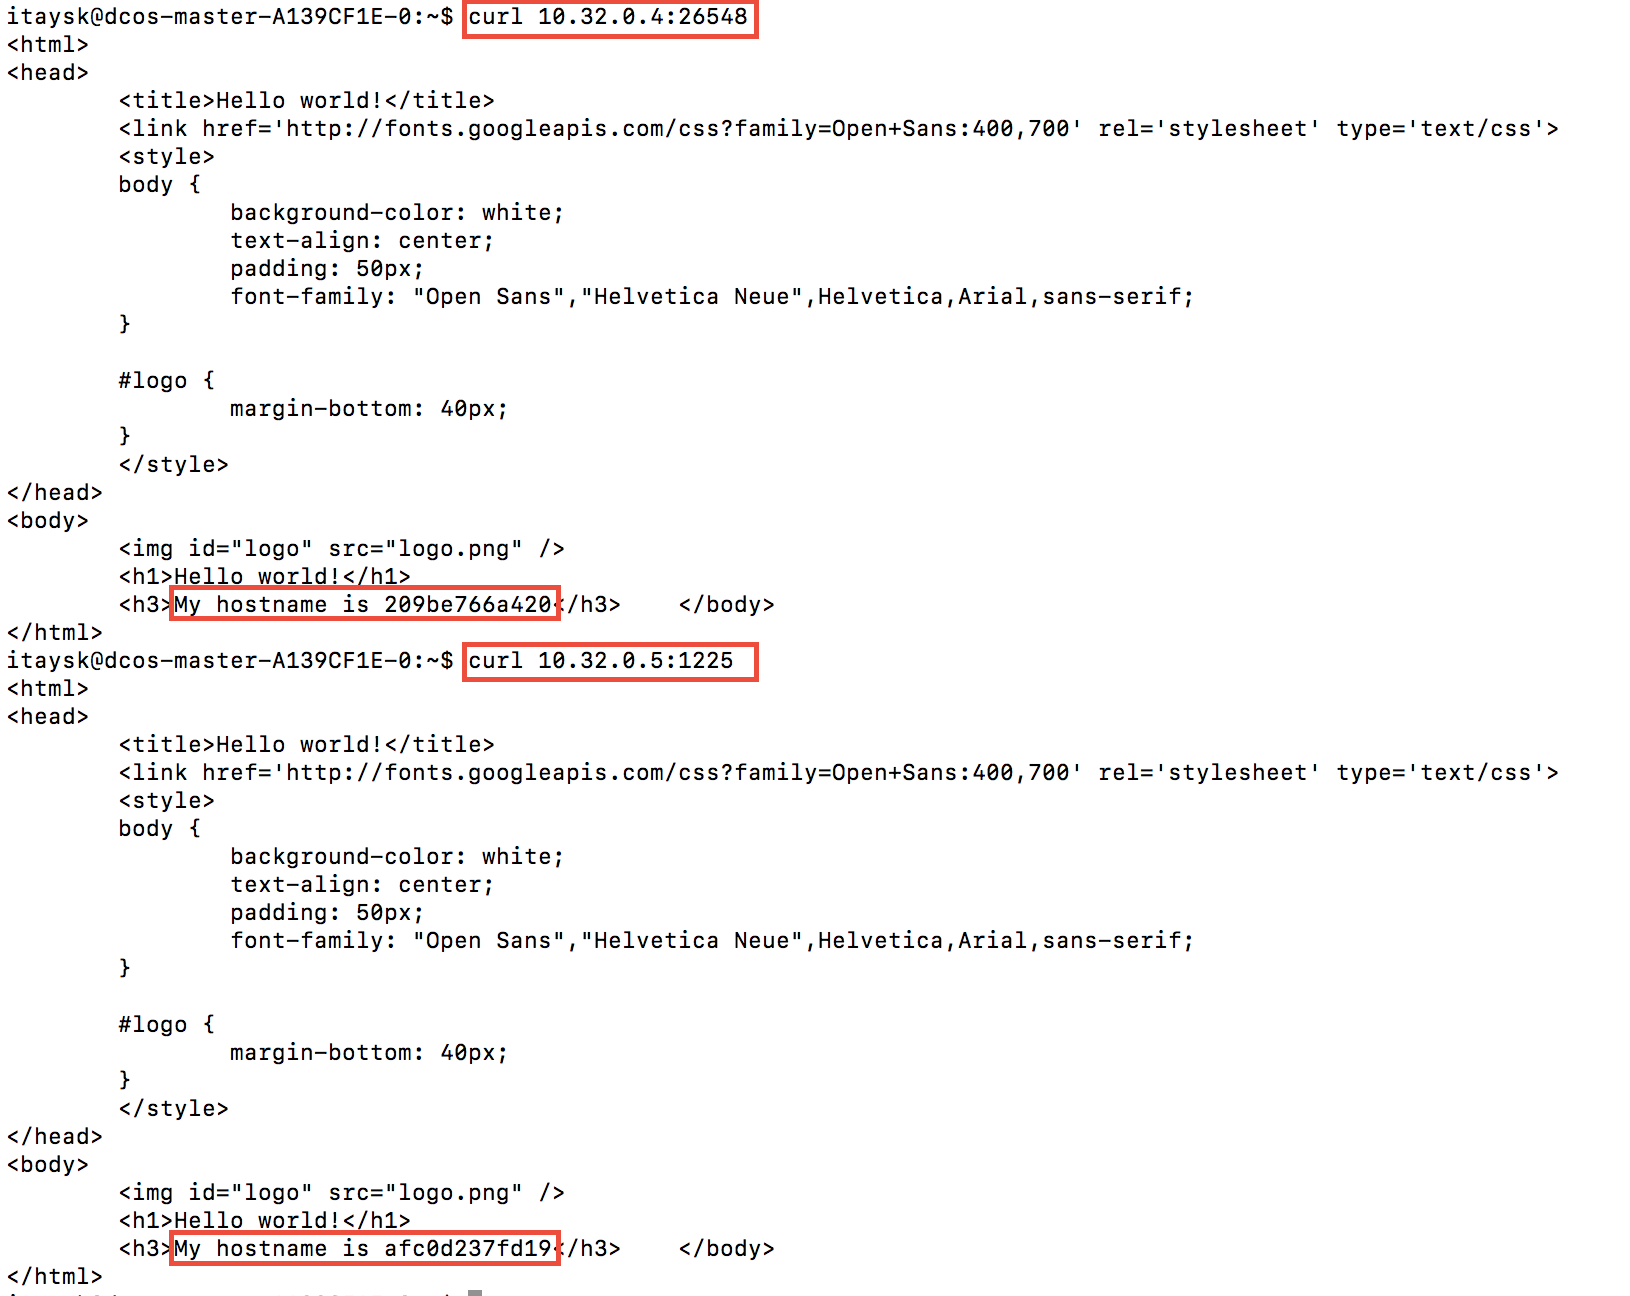
And the test:
MesosDNS revised
Great, so we are now free to move instances around as we please, but how do clients know how to reach our app? Previously MesosDNS helped us with IP address but we still had to know our fixed required host port.
Luckily, MesosDNS also support SRV records. These are DNS records that in addition to IP addresses, also include port information. The SRV name is a little different then the A record: ‘_servicename._protocol.framework.mesos’. Let’s check it:
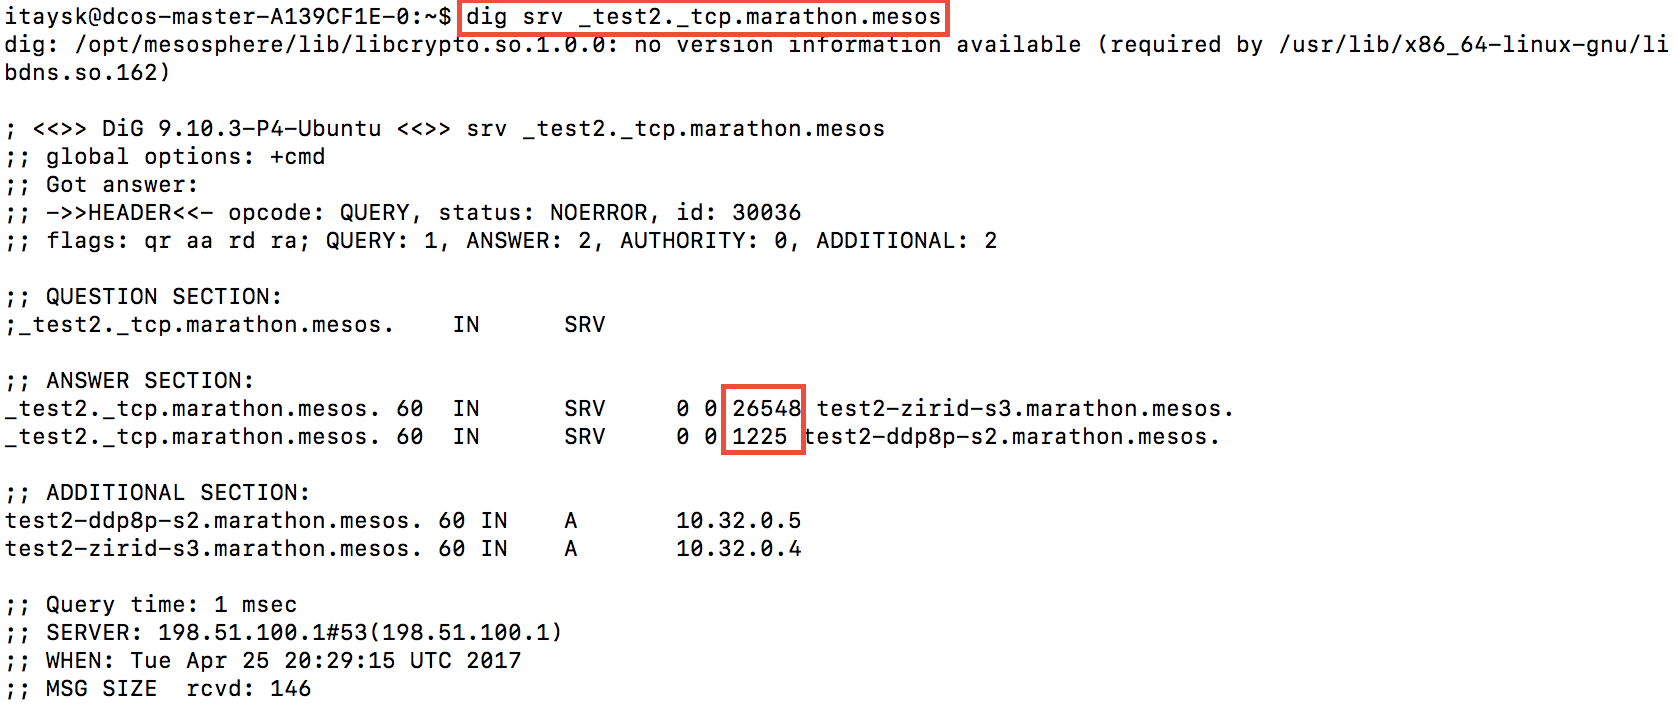
See how it shows the port numbers like in the Marathon UI? How cool is that!?
Unfortunately SRV records are not natively supported in many client libraries and in order to use that you’d probably need to modify your client code.
Additionally, it’s important to remember that as a DNS service, MesosDNS is not refreshed in real time. Also, it doesn’t really do load balancing.
Let’s explore some more options for service discovery / load balancing.
Load Balancer
DC/OS comes built in with a layer 4 load balancer, also known as ‘minuteman’. In order to use it, we need to fill in the ‘VIP’ section under the ‘Ports & Service discovery’ tab. The value is either a virtual ip (just a made up address), or a virtual name (just a made up name). In both cases you also specify a port to run under (again, made up port). Remember that this is a load balanced endpoint, so your clients only need to know about this endpoind and they’ll be routed to a backend endpoint. Let’s try this:
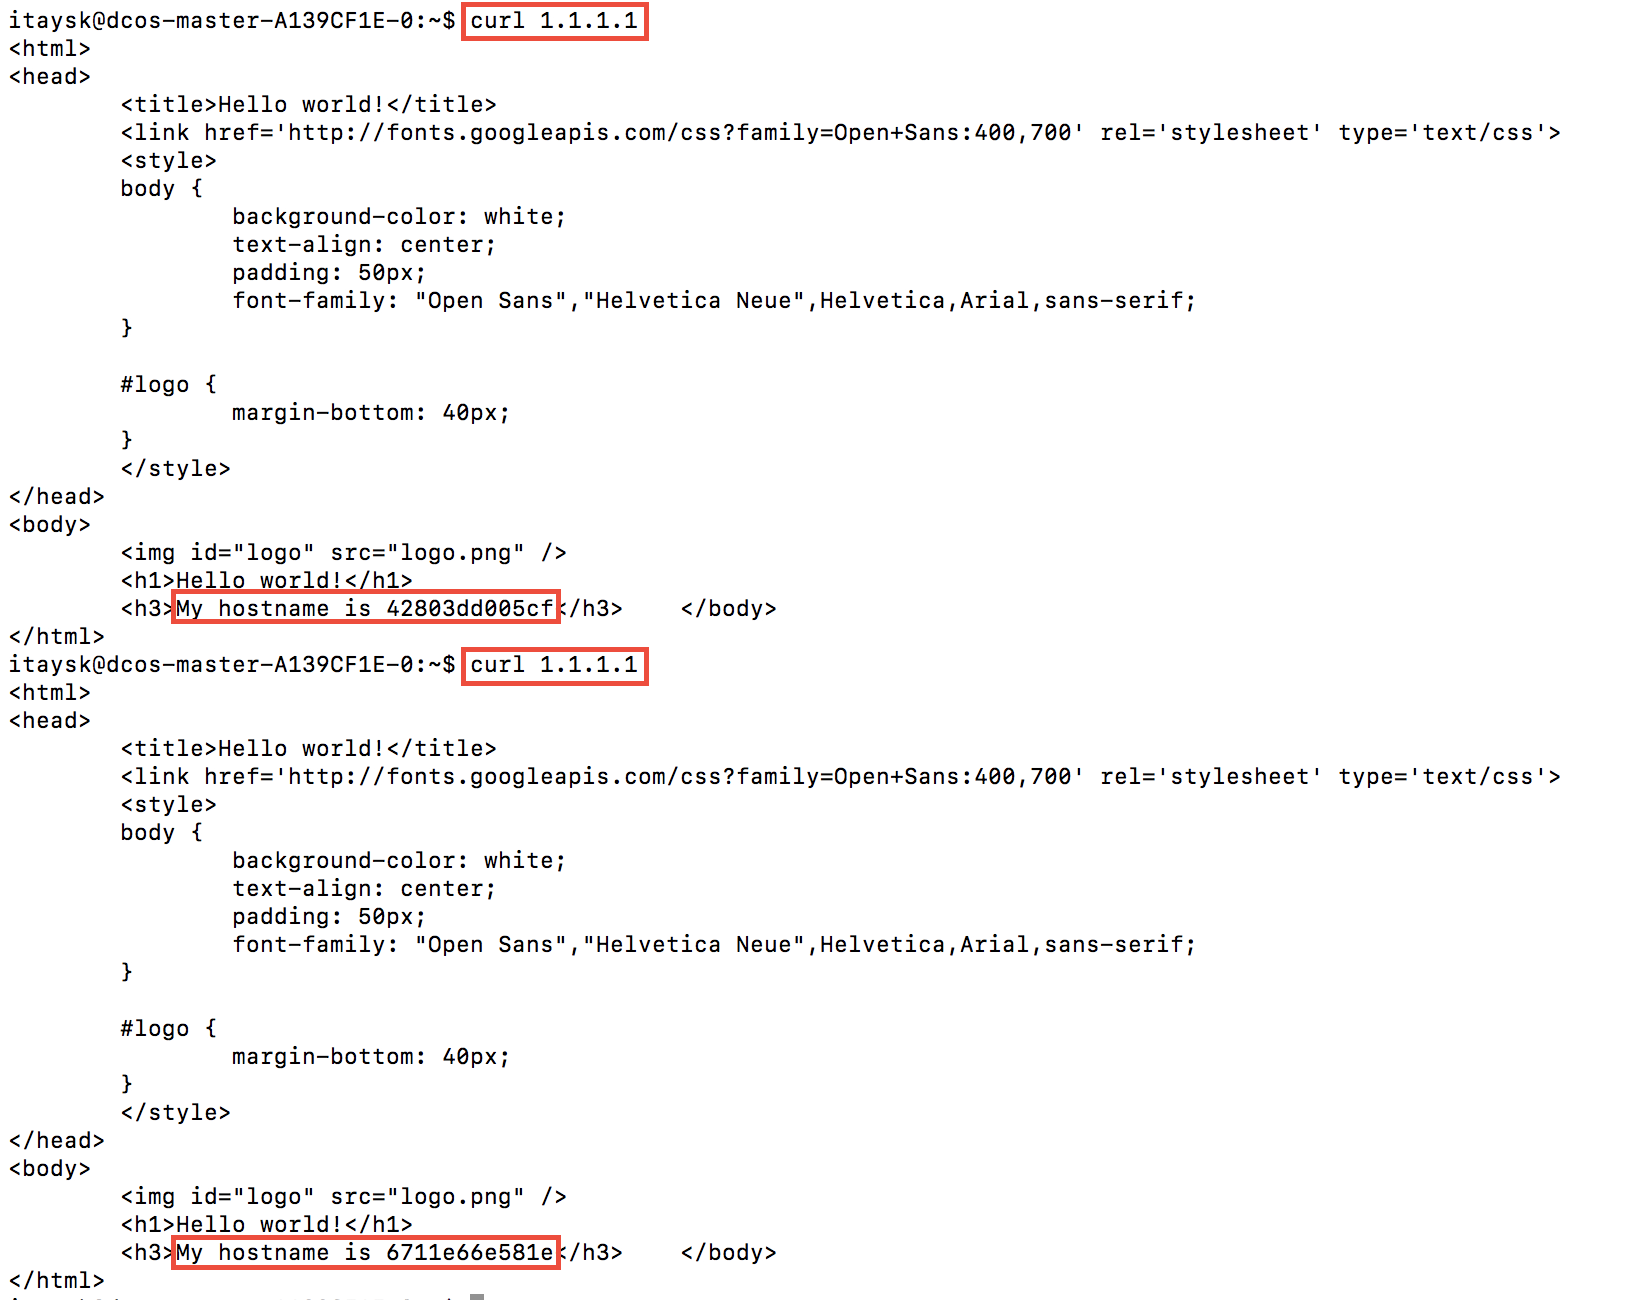
In Marathon, create a new app with same settings as ‘test2’, but under ‘VIP’, enter ‘1.1.1.1:80’. We’ll call this one ‘test3’.

From the master, we can hit that endpoint - et viola! our load balanced virtual ip address works:
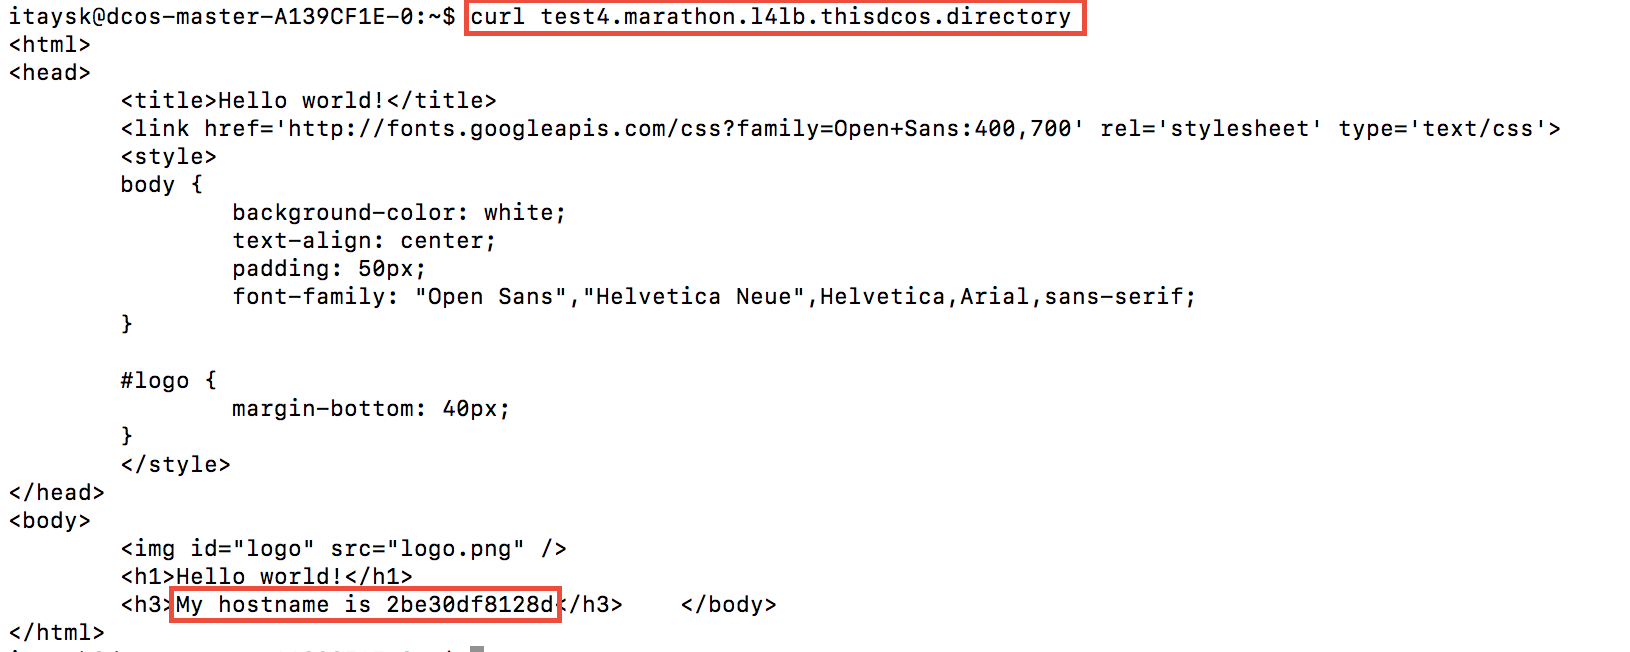
Create another app ‘test4’, same as test3 but this time use a name for the VIP: ‘/test4:80’.

The load balanced endpoint generally looks like: ‘servicename.marathon.l4lb.thisdcos.directory:port’. Let’s hit ours at ‘test4.marathon.l4lb.thisdcos.directory’:
Behind the scenes the UI sets a label on the port with key=VIP_{i} (where {i} is a zero based index), and value is your chosen VIP. Worth noting in case you author JSON templated manually.
The layer 4 load balancer is very handy and easy to use. But remember - it only works within the cluster.
Load Balancing extended
Marathon has a layer 7 load balancer, called ‘Marathon-LB’. This is essentially an HA-Proxy container, modified to reconfigure based on the state of tasks on the cluster. Since this is a containerized workload, it is running as a container under Marathon. We have to manually create it and more importantly monitor and scale it if needed. To create it, we will use DC/OS universe. It’s totally possible to create it via Marathon like we did before, but default configuration with DC/OS packages makes it easier for this demo.
Go to DC/OS Universe, find the ‘Marathon-LB’ package, and install it using default options (or from the CLI: ‘dcos package install marathon-lb’).
Most Marathon-LB options are boring, except one very important setting, called ‘Group’. The Marathon-LB Group is used to identify and distinquish one Marathon-LB from another in case there are more than one installed (more on this later). By default, ‘Group’ is set to ‘external’.
To use Marathon-LB, we label a Marathon app with label key=’HAPROXY_GROUP’, and the label value is the ‘Group’ identifier for the desired Marathon-LB. This label links a given Marathon-LB with a given Marathon application. A single Marathon-Lb can manage many Marathon applications, and you can scale the Marthon-Lb application to multiple instances like any other Marathon application. Enough talk, let’s get to it:
Create another app, ‘test5’, with simple bridge networking, and add the label ‘HAPROXY_GROUP:external’. Pay attention that this is not a label for the port mapping (like in the layer 4 LB example), but a label on the Marathon application.

After you created the app, view the created app configuration in Marathon, and see that the port mapping has an additional property called ‘servicePort’.
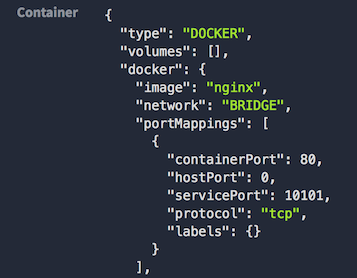 Truth is, that all of our previous apps also had a service port, but it wasn’t interesting for us until now. This service port is used by Marathon-LB to route to the specific app. It is unique in Marathon, and will persist across service restarts and failures. It was generated for us, but we could have manually chose one while creating the app. Anyway, make note of the service port for ‘test5’. In my case it is ‘10101’.
To test this, we go to the master ssh, and curl ‘marathon-lb.marathon.mesos:10101’.
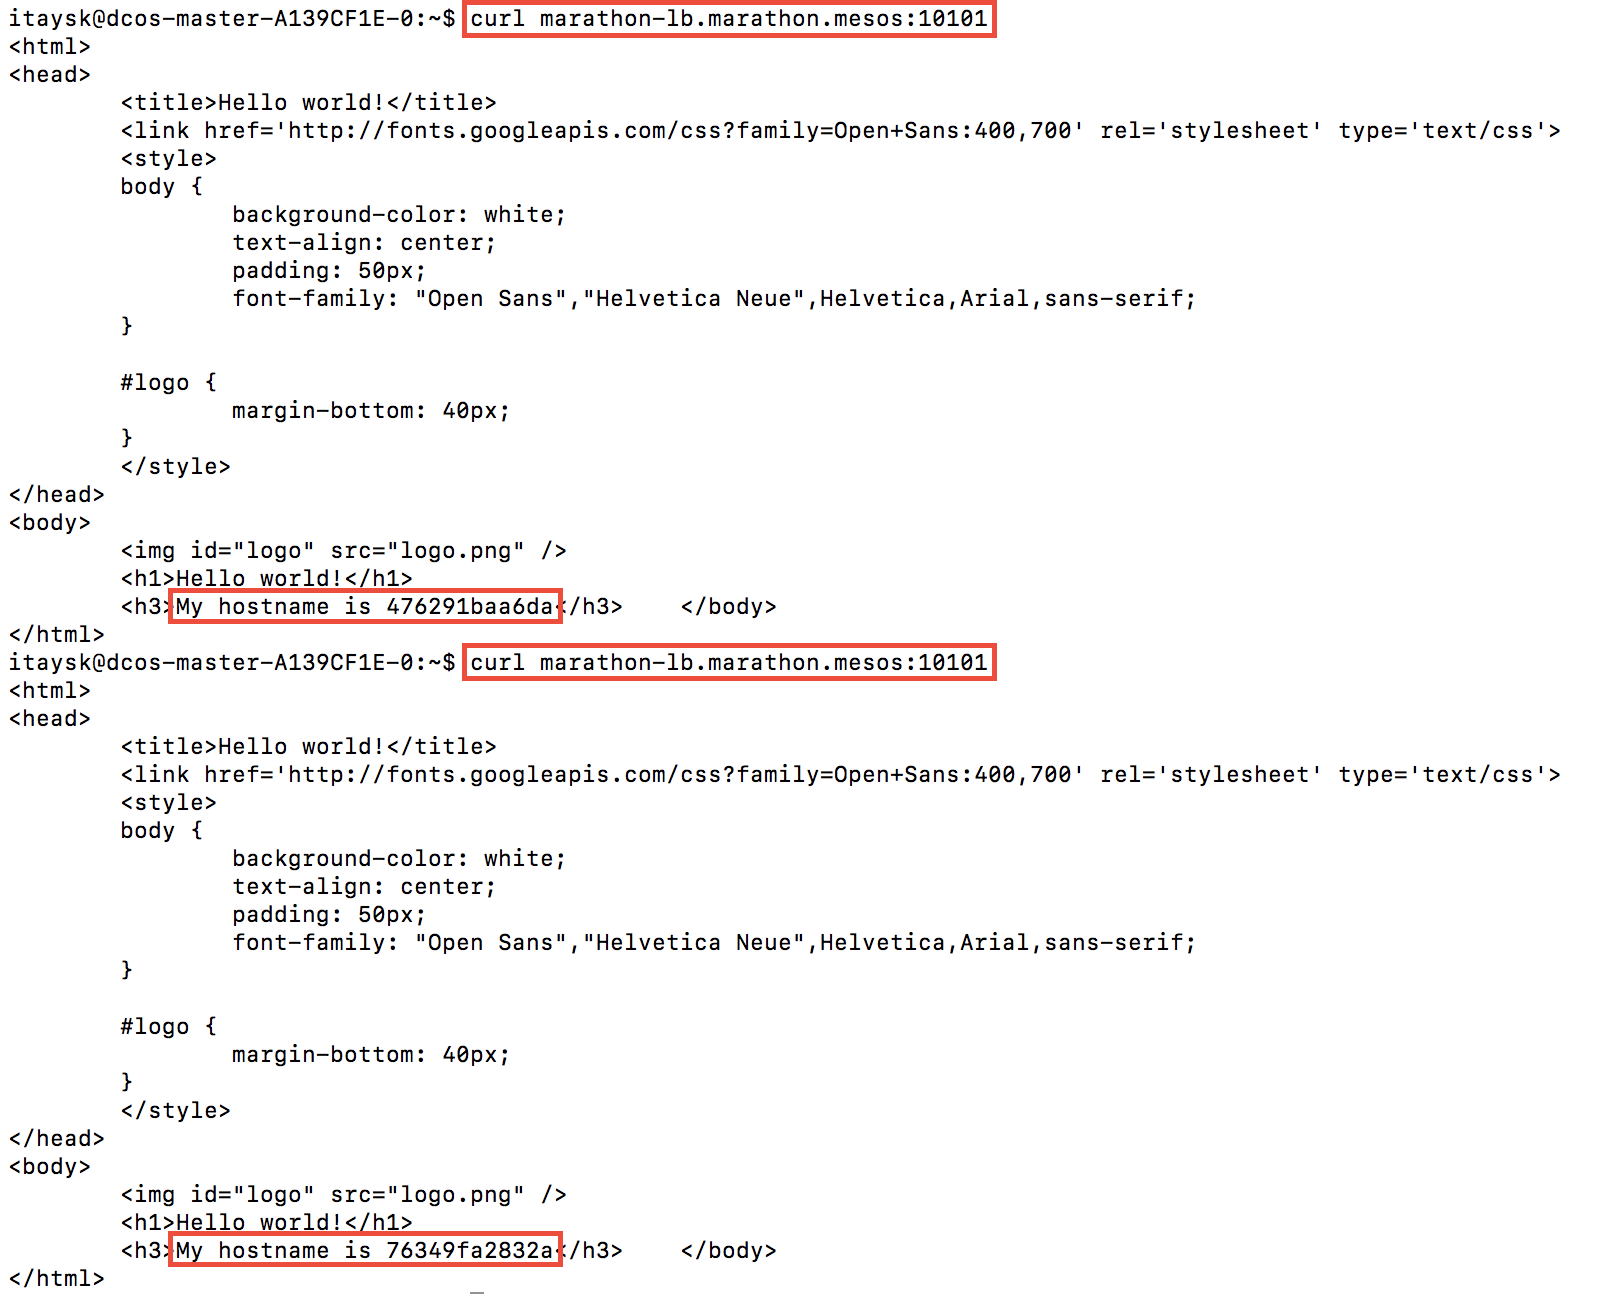
Recognize this address we used (‘marathon-lb.marathon.mesos’)? it’s the MesosDNS address for the Marathon-LB application (again, marathon-lb is just a container app run by marathon). Just making sure you are with me.
Marathon-LB is a Layer 7 load balancer, so it supports many cool HTTP tricks like SSL offloading, sticky session, cookies, and many more.
External LBs
I mentioned earlier that the ‘HAPROXY-GROUP’ label is used to link to one of many Marathon-LBs. Why would you want more than one? The canonical example is that you have 2 Marathon-LBs in the cluster. One on the public agents pool with group=external, and one on the private agent pool with group=internal. The external one takes incoming traffic from the outside world into the cluster, and the internal one is for communication between services. A given marathon application can be linked with any of the Marathon-LBs, or both.
Since your cluster might be running multiple different apps which should be accessed under different domain names, the external Marathon-LB will need to accept traffic directed at it under different host names. This can be achieved by adding the ‘HAPROXY_{i}_VHOST’ label ({i} is a zero based index), while setting your desired domain name as the value. Final exercise:
Create another Marathon application, ‘test6’, similar to ‘test5’, but this time add the label ‘HAPROXY_0_VHOST’ with value ‘testing6.test’ (in addition to the ‘HAPROXY_GROUP’ label from before).
In order to test it, I added the imaginary domain ‘test6.testing’ to my hosts file, and then I was able to test that it’s working:
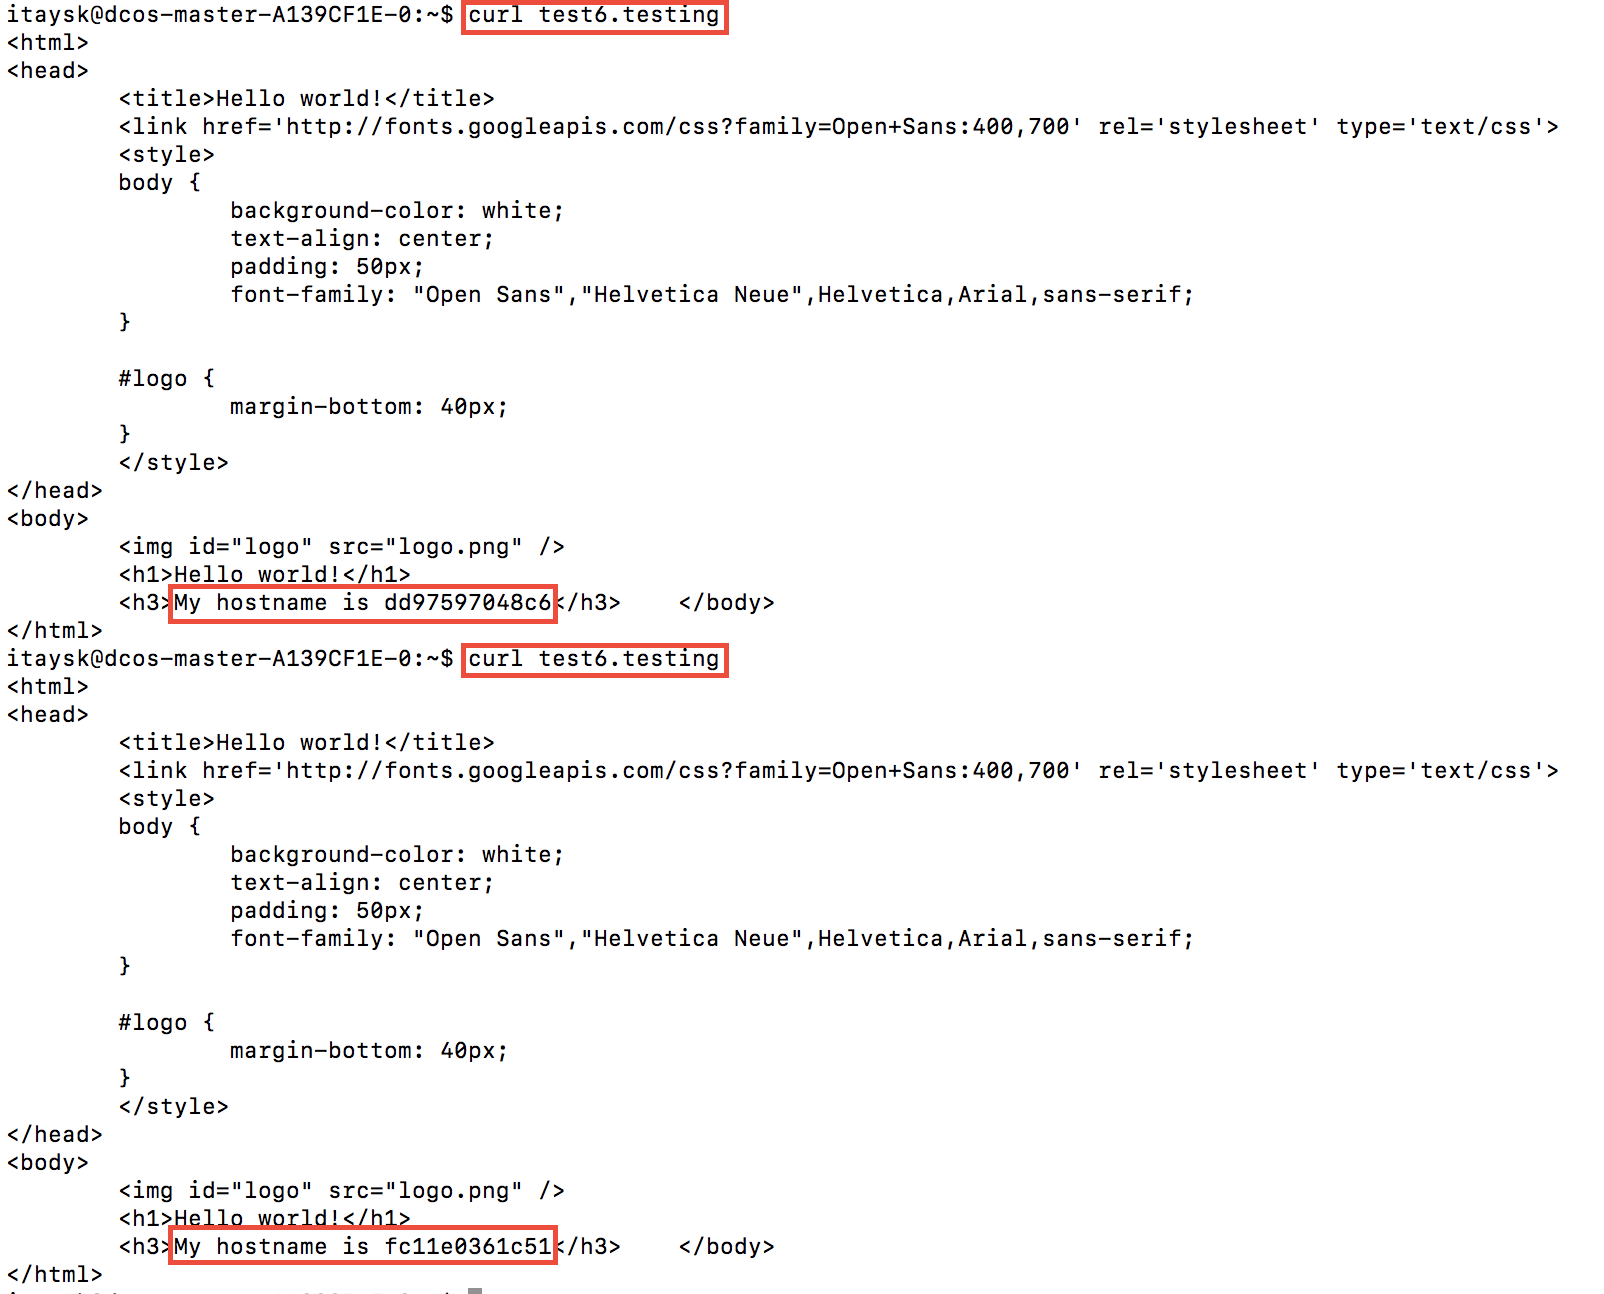
Notice how we didn’t have to specify the service port? That’s because VHOSTs are also exposed under port 80/443 on the Marathon-LB in addition to the individual service port.
Summary
DC/OS is a great platform, but it’s easy to get lost with all the options and configurations.
Naturally there is much more to dive into even in this focused topic of service discovery and load balancing. Each of the covered solutions (MesosDNS, Minuteman, Marathon-LB) has more options and tweaks and advanced scenarios, but at least now we have the tools to read on and advance.