 @itaysk
 itaysk
 itaysk
Securing Single Page Applications with Azure AD
Here’s a very common use case: You build a Single Page Application, which calls to some services. You want to secure both the app, and the service using Azure AD, but each of them separately. You are not using Angular 1.x.
I think nowadays this is the most common scenario for new applications, that’s why I was surprised to find out that there’s no sample, tutorial, or documentation that covers this scenario exactly.
There are many samples in the Azure Samples GitHub organiation, some of them are very close to what I described here, but none for exactly this case - Hence this post.
If you want to just straight to the code sample, it’s right here: https://gist.github.com/itaysk/66363c608b4f60fe97e08173b325080c
Scenario:
- Client is any web browser that wants to issue HTTP calls to the service.
- Client is not using Angular 1.x. To make is as common as possible I will use Vanilla JS.
- In order to access the client application, user must login against AAD.
- Service is any HTTP web service.
- Service is configured to be secured with AAD using OAuth 2. this part is outside the scope of this post.
One important requirement to understand is the independence between client and service. this is not a classic “client\server”. The service might serve other clients as well, might have different security constraints then the client, is definitely hosted under a different domain then the client, and generally does not have the same lifecycle as the client or is bound to it in any way. What I’m getting at is that client and service are two separate ‘applications’ (or ‘app registrations’) in Azure AD.
Step 1: Create Applications in Azure AD
I will be using the Azure Portal, but other methods are available.
1.1: Create Applications
Open Azure AD blade, open ‘App Registrations’ from the menu, click ‘+Add’.
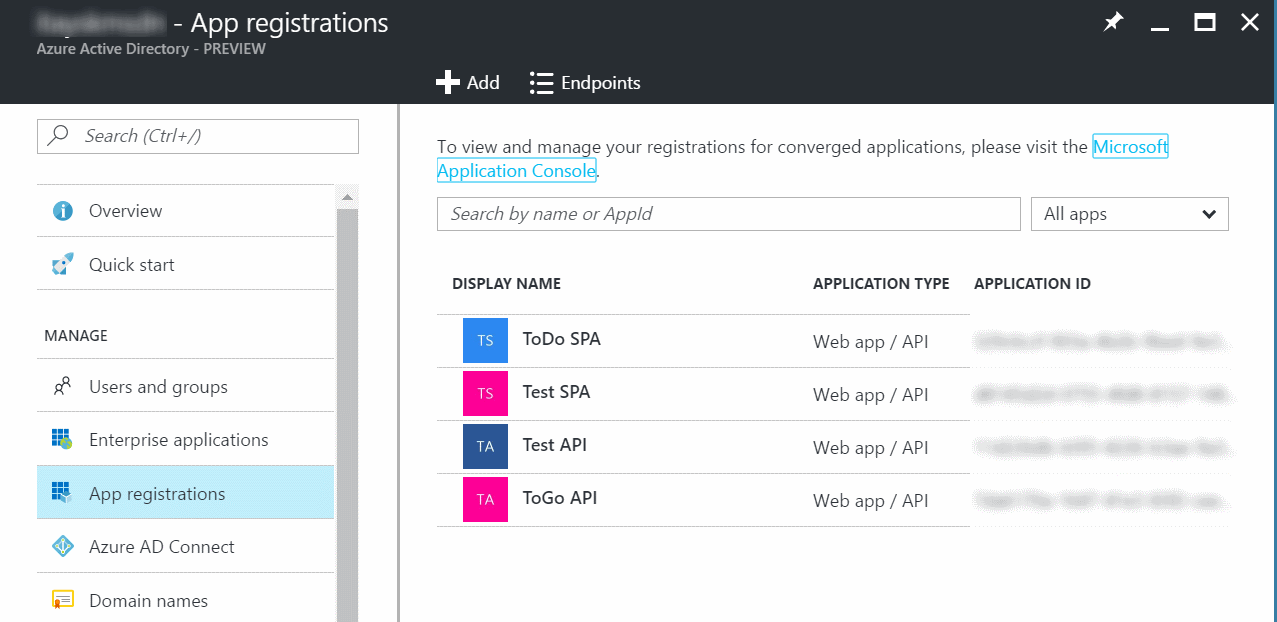
You need to create 2 apps, one for the client SPA app, and one for the service API.
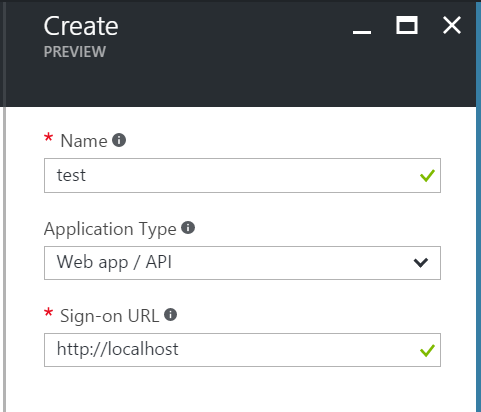
- ‘Name’ - just a friendly name for your reference.
- ‘Application Type’ - choose ‘Web app / API’ for both.
- ‘Sign-on URL’ - the URL where the app will be hosted. This can be changed later. There’s no real connection required from AAD to this URL, it’s just for reference and defaults. You can use localhost for testing, and change it later.
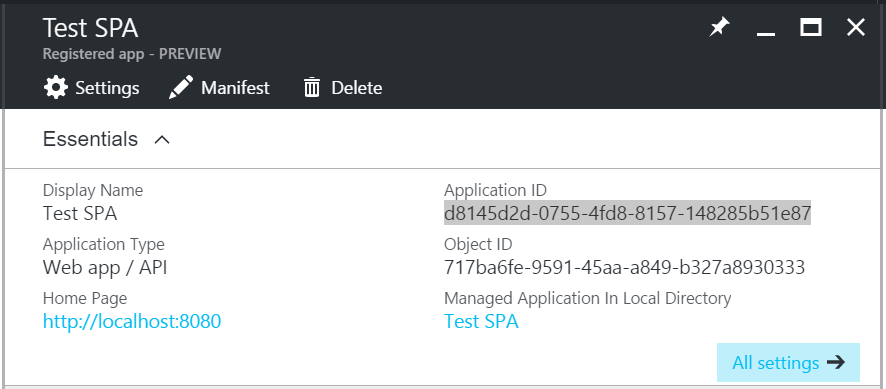
Note the Appication ID, you will need it for the code
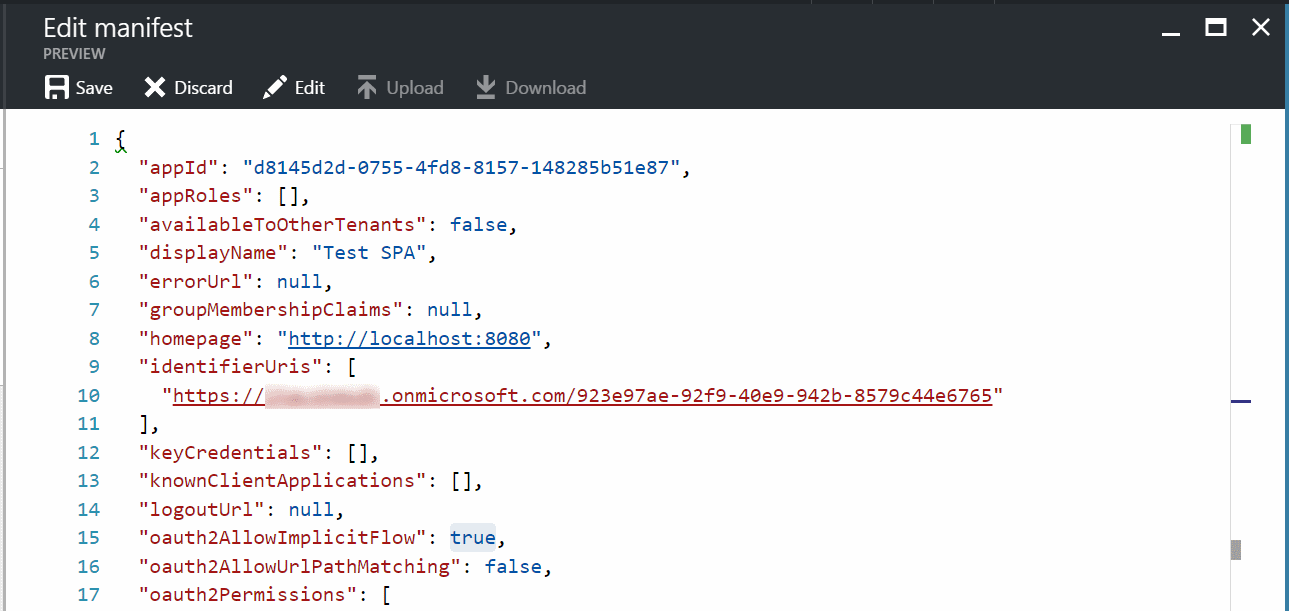
1.2: Allow the Implicit Flow
Open the blade for the client SPA application in AAD, and click on ‘Manifest’.
look for OAuth2AllowImplicitFlow and change the value from false (default) to true.
Click ‘Save’.
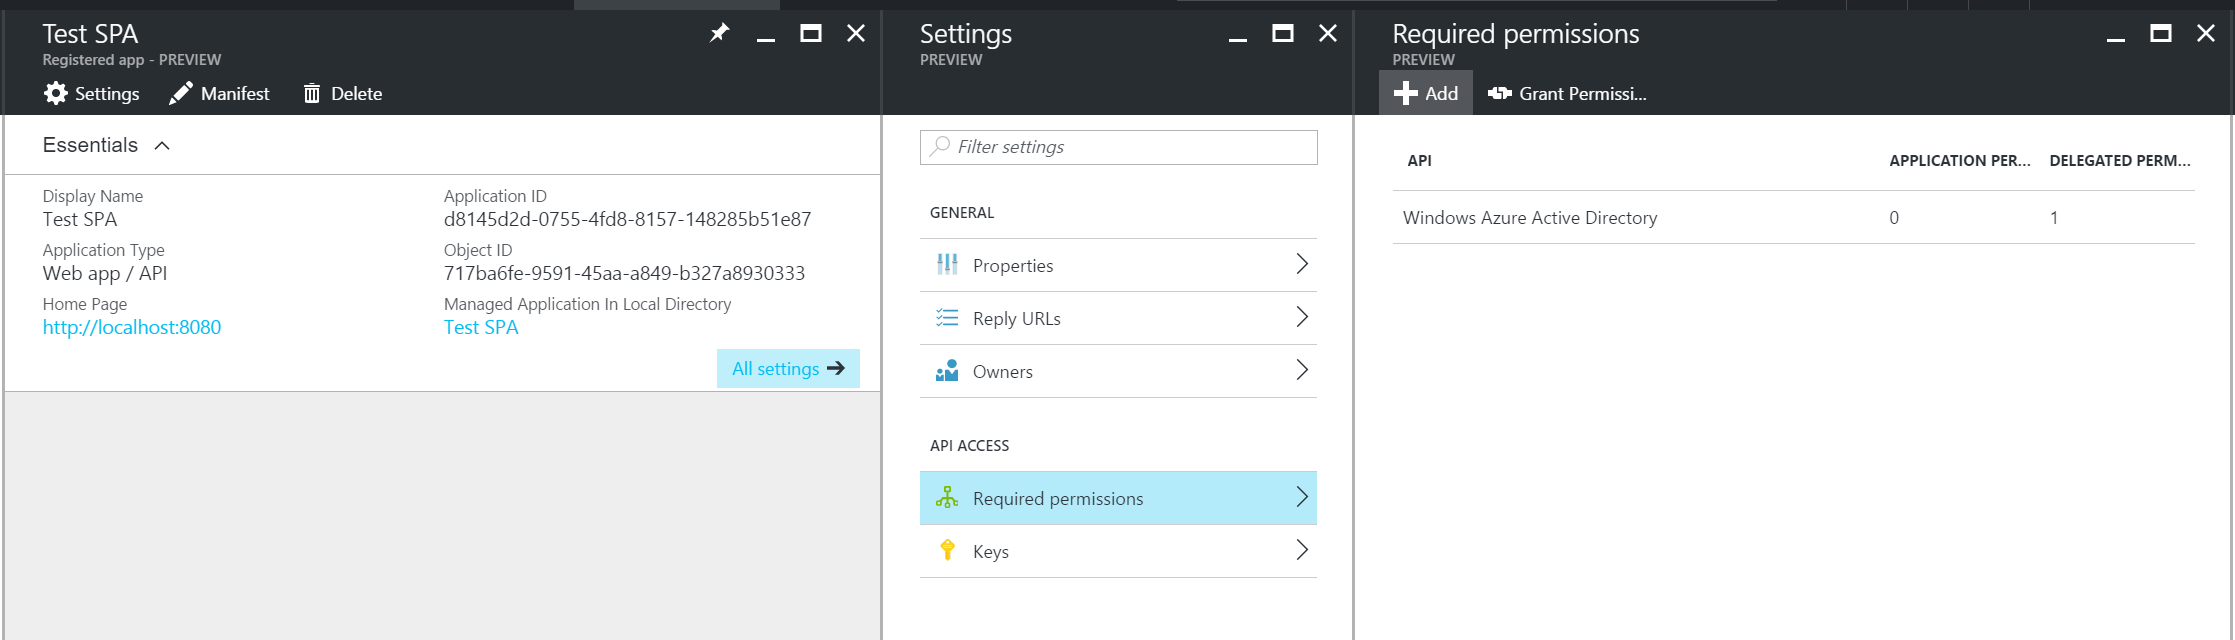
1.3: Grant access
Open the settings for the client SPA application in AAD, and click on ‘Required permissions’. Click on ‘+Add’.
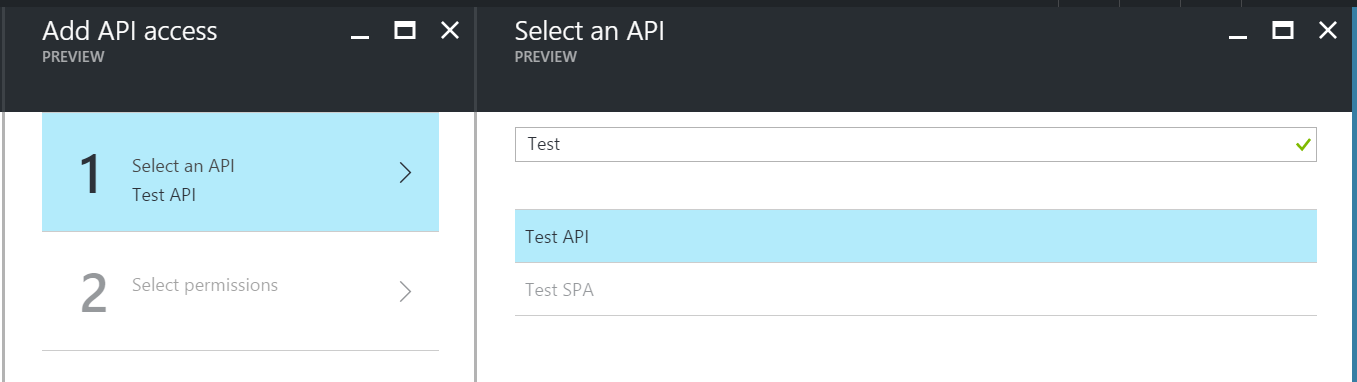
Your AAD applications will not be shown in the list, but you can still search for them.
In the search box, type the name of your service API application (this is the ‘Name’ property that you gave when you created the app registration).
Pick the service API, and continue.
In the next step, check the ‘Delegated Permissions’ checkbox, and save the changes.
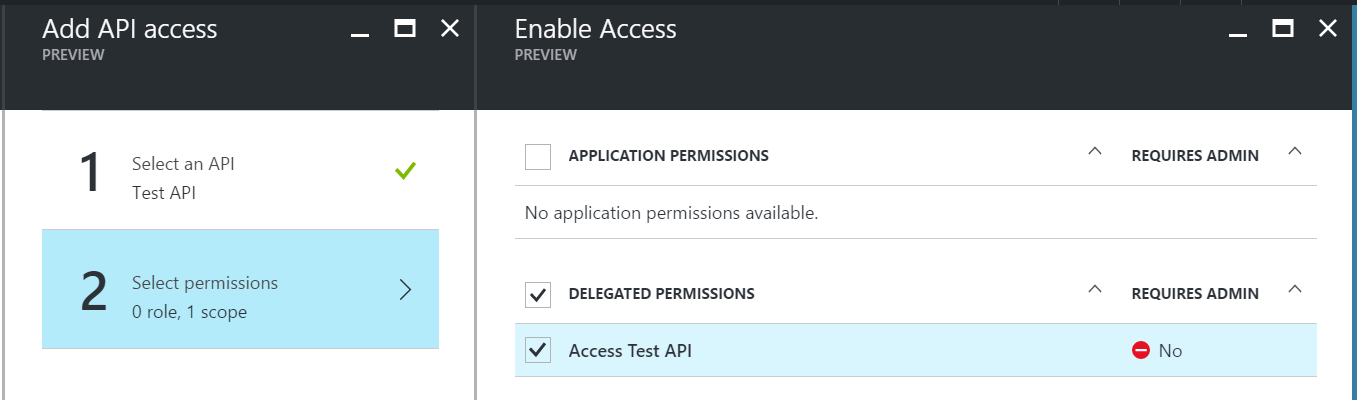
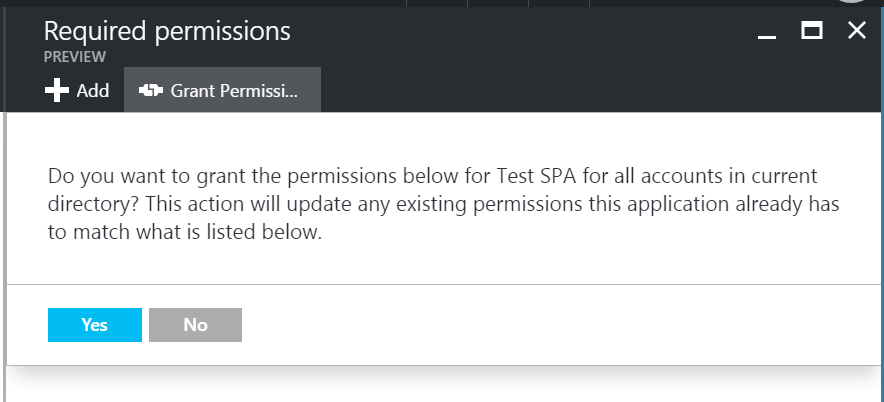
Back in the ‘Required permissions’ blade click on ‘Grant Permissions’ and approve.
Step 2: Code
As I mentioned before, I tried to keep it as general as possible and used Vanilla JS. The only dependency is ADAL.js. Get it https://github.com/AzureAD/azure-activedirectory-library-for-js/tree/dev/dist. You don’t need ‘adal-angular’ at all.
I also tried to keep the sample as minimal as possible, just demonstrating the flow of events. This is by no means production ready code.
Let’s dissect the code sample, guided by the flow of events:
2.1: User login
The basic flow is where the page loads, and user initiates the login() function via the UX. The browser will redirect to AAD login page. After successful login, the browser will redirect back what you set as ‘Sign-on URL’ when registering the app. The redirection will include a token in the query string.
When the page loads again there is a piece of code that detects the redirection and captures the token from the query string, parsing it and using it to populate structures in the AuthenticationContext.
After a successful login and redirection, we can ask for details about the user using AuthenticationContext.getCachedUser().
2.2: Acquire token
Once the user is logged in and AuthenticationContext is populated with user information, we can call authContext.acquireToken() in order to request a token for calling the service.
This is a different token then the one we got in the login process since it applies to a different AAD application. It is also obtained differently because this time it’s not a user interactive process.
There’s no need caching this token in order to save round trips to AAD, ADAL will do this for you. So you can call this function before every service call, and it will be smart enough to draw from cache before it goes to AAD.
2.3: Call service
With the service API token in hand we can now issue an HTTP call to the service, adding the obligatory Authorization header that will carry the token.
Note that since this is a cross-origin scenario, special care must be taken both in the client and service sides to make this scenario work, but this is outside the scope of this post.